I’ve applied the four coats of satin finish and one coat of the wax finish. As I was working on the finish, I thought of some more lessons learned that I should share.
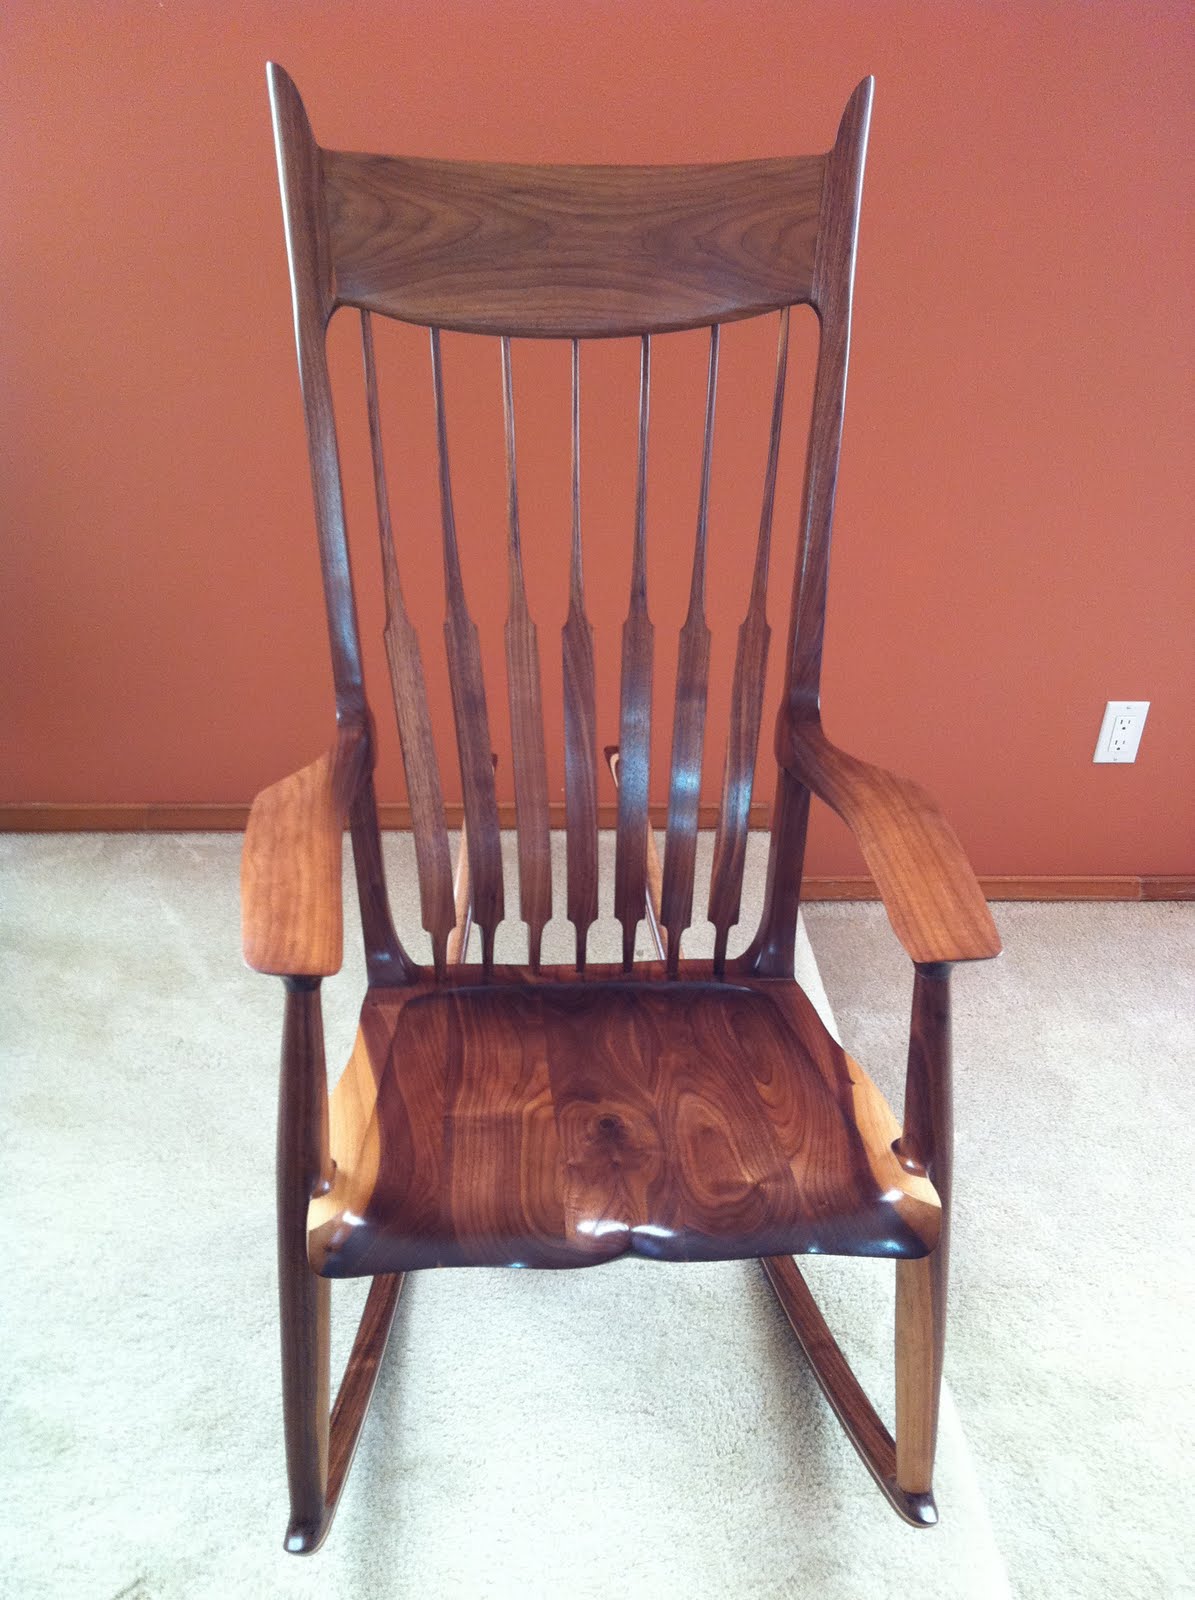
Although the sanding was tedious, it was worth every minute. You might feel like giving up at this point, or cutting corners on the sanding, but don’t. The first thing people say when they see my chair is, “Can I touch it?” The finish won’t cover up all of your sins, so take your time and sand the chair well.
I realized (too late) that I messed up on my leg-to-rocker transitions. I should have started with a block of wood and cut the laminations so that when it is glued up, it would look like a single block of wood again. Instead, I used a long strip that I had cut for the rockers and cut that into smaller pieces. This resulted in a stack of laminations with the grain staggered. It creates an interesting effect, but it doesn’t look like one piece of wood. I didn’t even realize what I had done until I started sanding. I also didn’t choose wood that blended well into the leg grain color.
This leads me to my final suggestion: plan everything before you start. Take some time before each shop session to think through your next steps. Review the instructions, watch the DVD, and walk through the steps in your head before you start cutting wood. Just five minutes spent in planning can save you hours of re-work. The forum on Charles Brock’s website is also full of good information that isn’t found in the book or DVD.
I received my completion certificate from Charles Brock yesterday. I’m now an official “Rock’n Chairman”! It feels good to be a member of this club.
My chair is full of flaws, but I’m proud of the result just the same. As my first attempt at fine furniture, I think I did ok. This blog has helped me to document my mistakes, so (hopefully) I won’t repeat them on my next chair. I hope it will also help you to avoid mistakes on your projects too.
Once again, I would like to thank Charles Brock for his fine instructional materials without which this project never would have happened. He was always very responsive to my e-mails and encouraging. I’m also grateful for the link he provided from his website to my blog.
I also have to thank my wife for her patience in letting me spend the money and hours on this project. My plan was to sell this first chair, but she has talked me into keeping it because she likes it so much. That’s a big testament to her support.