Sunday, August 21, 2011

Final Pictures

I haven't had time to get professional pictures taken yet, but here are some better pictures from my living room.  The 6 coats of finish came out looking very good.  After waiting several days, I also applied some paste wax.  I'm very happy with the result.


Thursday, August 11, 2011

More Lessons Learned


I’ve applied the four coats of satin finish and one coat of the wax finish.  As I was working on the finish, I thought of some more lessons learned that I should share.

Although the sanding was tedious, it was worth every minute.  You might feel like giving up at this point, or cutting corners on the sanding, but don’t.  The first thing people say when they see my chair is, “Can I touch it?”  The finish won’t cover up all of your sins, so take your time and sand the chair well.

I realized (too late) that I messed up on my leg-to-rocker transitions.  I should have started with a block of wood and cut the laminations so that when it is glued up, it would look like a single block of wood again.  Instead, I used a long strip that I had cut for the rockers and cut that into smaller pieces.  This resulted in a stack of laminations with the grain staggered.  It creates an interesting effect, but it doesn’t look like one piece of wood.  I didn’t even realize what I had done until I started sanding.  I also didn’t choose wood that blended well into the leg grain color.

This leads me to my final suggestion: plan everything before you start.  Take some time before each shop session to think through your next steps.  Review the instructions, watch the DVD, and walk through the steps in your head before you start cutting wood.  Just five minutes spent in planning can save you hours of re-work.  The forum on Charles Brock’s website is also full of good information that isn’t found in the book or DVD.

I received my completion certificate from Charles Brock yesterday.  I’m now an official “Rock’n Chairman”!  It feels good to be a member of this club.

My chair is full of flaws, but I’m proud of the result just the same.  As my first attempt at fine furniture, I think I did ok.  This blog has helped me to document my mistakes, so (hopefully) I won’t repeat them on my next chair.  I hope it will also help you to avoid mistakes on your projects too. 

Once again, I would like to thank Charles Brock for his fine instructional materials without which this project never would have happened.  He was always very responsive to my e-mails and encouraging.  I’m also grateful for the link he provided from his website to my blog.

I also have to thank my wife for her patience in letting me spend the money and hours on this project.  My plan was to sell this first chair, but she has talked me into keeping it because she likes it so much.  That’s a big testament to her support. 


Sunday, August 7, 2011

The Finish Line


The last week was spent doing more sanding.  I went over every inch of the chair and continued to find more nicks and small scratches.  It was as if there were gremlins in my shop adding scratches when I wasn’t looking.  By the time I got down to 320 grit, the wood was silky smooth.  This morning I finally completed the sanding to a point I was happy with.  Here's a picture of it fully sanded.


I wanted to mark my chair before I applied the finish, so I branded the bottom of the seat with my name.  (The brand was a Christmas present.)  I also wanted to date the chair, so I embedded a new penny.  I used a 0.75” forstner bit to sink a shallow hole, and then I epoxied the penny into the hole.  I think this makes for a nice decoration and helps to date the chair for future generations.


I made a stop by Rockler and purchased the Sam Maloof signature finish.  It’s composed of 1/3 tung oil, 1/3 linseed oil, and 1/3 poly varnish.  The instructions recommend 4 coats.  It is wiped on liberally, and then wiped off.  I have to wait 24 hours between coats.  For the top coat, I will use the Sam Maloof finish that is tung oil, linseed oil, and carnuba wax.  I will apply one or two coats of this and then buff it to a glossy shine.

I applied the first finish coat today.  The grain darkened nicely and really popped!  It looks great.  I can’t wait to get the remaining coats on.  Here is what it looks like.


 This has been an amazing learning process.  My rocking chair project has taken me almost 10 months to complete (I’m sure most people can do it in far less).  Many people have asked me how many total hours I have spent.  I never kept track, but I estimate somewhere between 300 and 400.  Now that I have all of the patterns and jigs completed, and I know what I’m doing, I’m sure the next one will take much less time.

Once I have all of the finish applied, I plan to get some professional pictures taken of the chair.  I will post them as soon as I can.   Rock on…

Sunday, July 31, 2011

Rockers (Part 5)


Today I finished sculpting the back legs into the rockers.

Here are some pictures before the sculpting.  You can clearly see that the legs, which are oriented straight front-to-back, are off set from the rockers, which are oriented at 8 degrees.  This makes the sculpting a bit of a challenge.


I started by using my angle grinder with a sanding disk to quickly blend the rockers and legs.  Then I used my microplane to round the corners on the outside of the legs and on the transitions.  The insides of the legs were left with hard line corners.  I finally went over everything with the random orbital sander and 60 grit paper to quickly remove the scratch marks.  Here are pictures of the final product.  The last picture clearly shows the apparent “twist” in the leg joint.


I will have to use some filler on the joints as there are still some small gaps.  However, I’m happy that I’m in the final stage of sanding.  I will go over the entire chair up to 320 grit, and then go over it again using a superfine 3M sanding pad prior to finishing.  I hope that by my next post I will be applying the finish! 

Rockers (Part 4)


Yesterday I finished shaping the rockers (with the exception of the back legs).  I started by sketching out the parts that would be sculpted into the legs and the ends of the rockers.  I did this just by eye, and then cut the patterns using the band saw.  


Once cut, I did some sanding and then routed a 1/4” radius on all edges (except where the legs meet the rocker).  I found that it took longer to do the tool setup then to actually cut the wood! 

At this point, the rockers were finally starting to look like real rockers.  I used files and a microplane to shape the ends of the rockers.  The maple laminate looks great popping through the walnut.  I used the sander to adjust the curves and make sure the figures matched on each rocker.  The cyma curves make the rockers look like a pair of snakes.


I took a 1/2" dowel and sanded it to a smaller diameter.  The dowel was used to hold the rocker in place so that I could shape the rocker to the front leg.  The smaller diameter prevents it from sticking in the hole.   I also used a clamp to hold the back leg in place.  Again using files, microplane, and sandpaper, I sculpted the front leg transition.  There is a hard line that starts on the inside of the leg and then spirals around the front towards the bottom-outside edge.  The hard line then softens into the curve of the rocker.  This is all a matter of taste and you can make the design however you want.  Again, my goal was to make the chair as close to the Maloof design as possible.


I wanted the back legs to be joined before I started the sculpting.  That is to ensure that the transitions are in the correct orientation.  To install the rockers, I turned the chair upside down on my bench.  I used an old towel to pad the bench and avoid scratching the arms.  My workmate bench turns out to be the perfect height because the ears of the chair do not touch the floor.  I clamped the rockers to the legs, again using the small dowels on the front legs.  Then I used an 8 degree jig to properly align the rockers and to make sure they are centered.  The jig is simple to make and explained in the Brock instructions.  I ran into a problem here because the back legs were not parallel with the rocker transitions. This created gaps in the joint.  It’s not an easy thing to correct because the leg is at a compound angle with respect to the transitions, and the transitions have a slight curve.  It took quite some time to file and sand the leg to the point where it mated correctly

Once the rockers were correctly oriented, I marked a line along the side of the rocker and back leg to show where the connecting dowel should go.  I used my Dowel-It tool to guide the 1/2" drill through the rocker and into the back leg.  Note that Maloof did not drill through the rocker.  He somehow managed to install the rockers onto dowels even though they are at different angles.  The Brock method is easier.  The next step was to mix up some epoxy, insert the dowels, and then clamp the rockers into place.  The dowels were made from 1/2" oak stock.  I fluted and chamfered the front leg dowels. The back leg dowels were not fluted on the ends that stick out of the rockers.  I did this because I wanted the dowel to be perfectly flush with the hole where it exits the rocker.  The back leg dowels were cut extra-long so they stick out during gluing.  After the epoxy dried, I sawed them off flush and sanded.

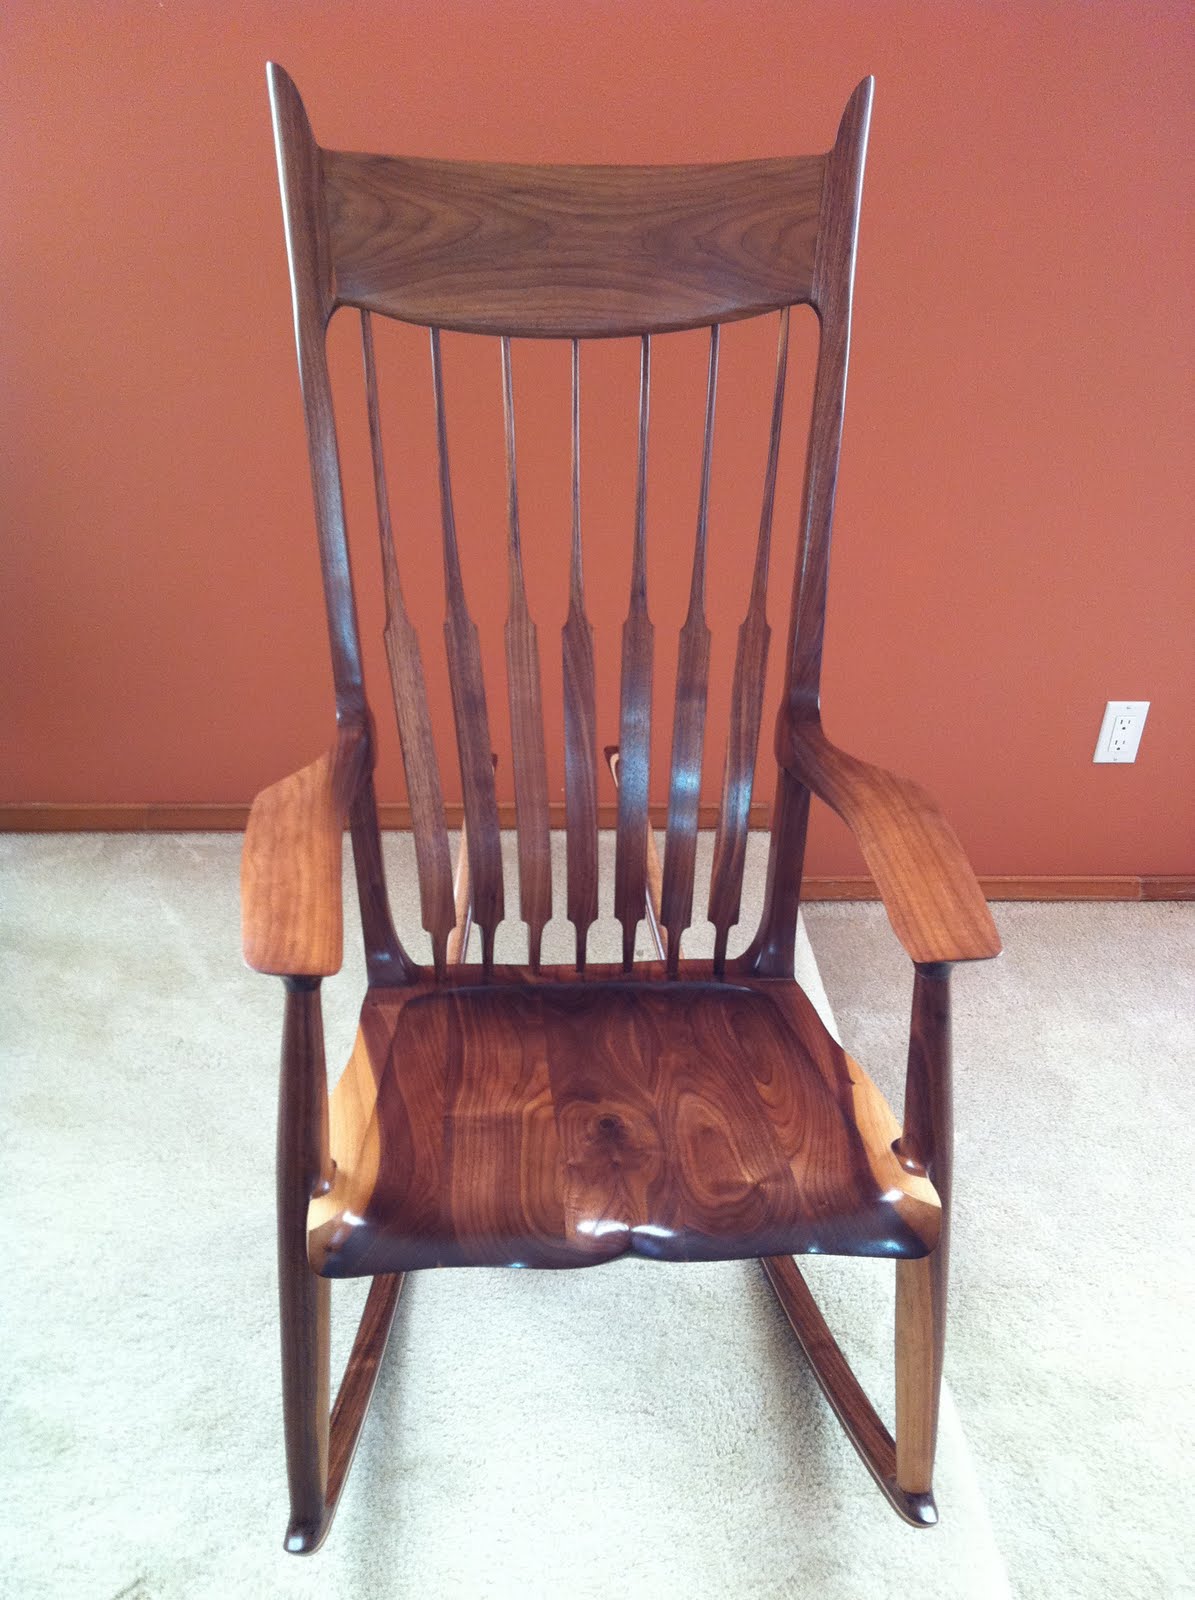
Now the chair is essentially complete!  I brought the chair inside and took it for a test drive.  It rocks just fine!  No creaks or pops.  It feels very nice to the touch.  Today I plan to complete the sculpting of the back leg transitions.  Next week I will continue to sand the whole chair, and next weekend I hope to start applying the finish.


Lesson Learned:  During all my shaping and sanding yesterday, I neglected to wear a mask.  This was a big mistake as the walnut dust caused severe irritation of my sinuses.  Always wear a mask!