I was delayed while finishing up some last minute Christmas presents, but now I have two weeks to spend in my shop. I’ve decided to move onto the front legs. I’m just not in the mood to tackle shaping the seat yet.
The legs start out as 19-1/2” blanks of 8/4 stock. The width is cut just slightly wider than the bridle joint. That way I can sneak up on the exact width by shaving off very small amounts on the jointer. Once the width is just right, I marked the inside of the leg 7” down from the top. This will be where the dado starts. I measured the tenon on the seat joint with calipers to get the thickness, and then marked this dimension on the leg as the width of the mortise (dado). The tenon thickness isn’t all that important, but the matching dado in the leg must match it exactly.


I used a sled on my table saw to cut the dado using multiple passes instead of a dado blade. I started with the inside (the side facing the seat) and cut the dado slightly small, and then carefully enlarged it until it fit snuggly on the tenon. This took many tries since I didn't want to cut out too much and have a loose joint. At this point, you can only fit the dado onto the tenon at an angle because the corners haven’t been rounded over. After getting the fit I wanted, I then cut the dados on both sides to the same size. Although the left and right leg joints *should* be identical, I found that they were not. So, don’t assume you can just cut the left leg to match the right. They have to be individually fit.


The next step is to round over both inside edges. I did this using a 3/4” round over bit on my router table. The round over cut starts above the joint and ends below the joint leaving enough room for shaping later. I was very impressed with how easily the Whiteside bit slid through the wood. I slowed the router speed to prevent burning, but the router barely even noticed when that big bit hit the walnut. Now the leg should be able to fit completely into the joint.
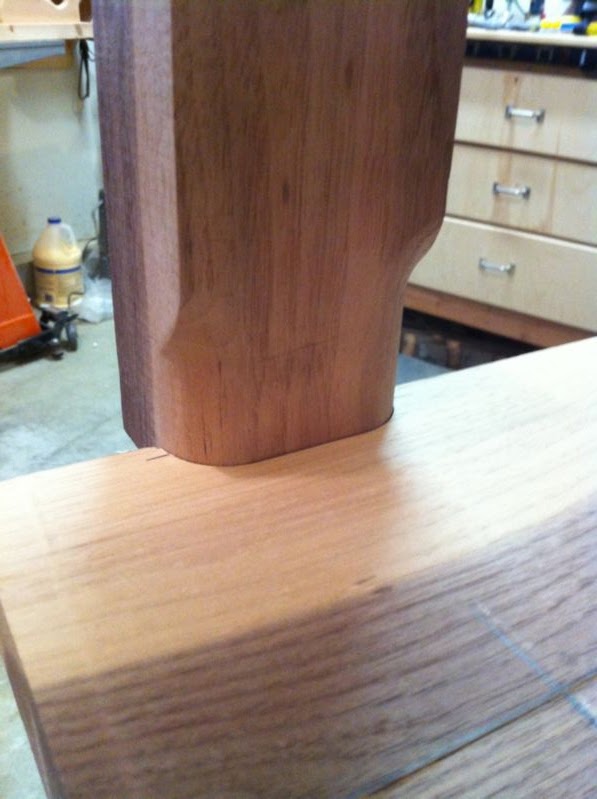
When fitting the legs to the seat, I had to be very patient. It takes a lot of trial and error to get the joint to fit perfectly. Charles Brock uses a router plane to trim the dado to snug up the joint. I don’t own a router plane, so I just used a chisel and some sandpaper to slowly remove wood as needed to make the joint fit. There is no magic here. You simply have to look and feel for the tight or rough spots and carefully trim them down until things finally slide into place. Take your time.
Next, I used the pattern to mark out the basic leg shape. I band sawed the piece to shape on the sides and inside face. (You can probably see the burn marks on the wood. I clearly need a new saw blade!) This step eliminates wood that would otherwise have to be removed by turning. It also helps to square the piece. Note that the “square” is offset from the actual center. This lets you turn the part in a way that mimics offset turning. In other words, the center of the leg spindle is offset (outboard) from the center of the bridle joint.

I installed the bed extension to my Jet mini-lathe so that it will accommodate the full length of the front legs for turning. It was just a matter of aligning the bed and putting in two bolts. One of the bolts wouldn’t engage, so I tried to clean up the threads with a die. Then I realized that the bolt was actually bent. It was a standard 5/16” bolt, so I just grabbed another one from my hardware stock. The bed aligned nicely and the tail stock moves smoothly across the joint. This modification will now allow me to turn up to 40” spindles. For me, this was a much better solution than buying a new full-size lathe.


The legs only need to be rough tapered to 1-1/4” diameter at each end. There will be more shaping later, so I didn’t bother to sand the legs smooth. I used a standard roughing gouge. After turning the legs, I bored 1-1/4” holes in each end for dowels that will be used for attaching the arms and rockers later. I used the lathe and a 1/2” brad point bit for the boring.

Here’s what the finished product looks like. I was very happy with the results, and best of all there was no blood-letting today. ;)

No comments:
Post a Comment